|
Click to recommend this page:
| |
 Introduction
Before we begin, we should get one thing out of the way.
I often get the question, "What were your camera settings when you
took that picture?" Beginners ask this question because they think that
the answers will help them understand what kind of exposures (camera
settings) will give them similar results. But, this doesn't work.
You get desired results by adopting good habits and methods that yield
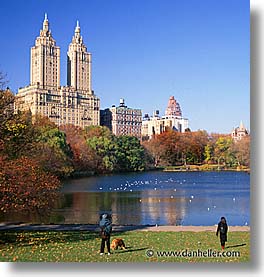
the kinds of pictures you look for. For example, it doesn't help you at
all to see the photo shown here and know that the exposure may have been
1/60 second at f8. (I have no idea what the exposure was.) The reality
is, even two apparently identical scenes—say, a sunset, or a night shot—may
have entirely different characteristics, such as ambient light that shift
the exposure one way or another. The photos may appear the same, but they're
not. The real way to get the proper exposure is not to know what the camera
settings were, it's to develop methods and habits that yield the kind of
image theme you're looking to create. Photography isn't just about reflecting
reality as your eye sees it—it's about achieving a particular aesthetic feel.
You can over- or under-expose a picture and get very different, and very
good results. If you're the type of person that asks what the camera settings
were for a picture, you may want to skip this chapter now, and first go
to Introduction to Photography Technique. This chapter gets into more of the techniques and
methods that are applicable once you have a good sense of working with your
camera.
Given all that, let's set your expectations. The biggest mistake people
make in taking pictures is expecting that what they see through the camera
is exactly what they're going to get in the photo. (Worse, they expect this
from other photographers!) While this may be the case for simple,
outdoor daylight pictures at times, there are other scenes that are
more difficult for one simple reason: the amount of light you see is
a broader range than the amount of light that can be captured on film or
digital sensors. If you were to assign numbers to the range of light
visible by the human eye, you'd get a range that went from 1 (the darkest
light you can see) to 16 (the brightest light). While your eye can see
all this light at the same time, the camera can not. In fact, it can
only capture only 5 to 7 of those segments (depending on the camera) in
one image. Note the difference here: sensors or film can capture
light all across the light spectrum, just not all at the same time
like your eye can.
 Basics
When you see a scene that you like, you need to adjust your camera's
settings so that enough light is exposed so that the image is best
represented. There are two things that govern the "right amount of
light": aperture (the size of the little hole that lets light through
the lens), and shutter speed (how long the shutter remains open for
the light to hit the film or sensor). To determine the amount of light
you want to expose, you need to measure the light. This is
also called metering light. But, as you can see in some of the
photographs on this page, the amount of light at various points in the
scene can vary—some areas are very bright, whereas other areas are
rather dark. The technique for measuring light applies to all kinds of
photography, regardless of the type of camera you use, even if
you use a digital camera. Once you can measure light to get exposure
values, you then make adjustments for the type of medium you're using,
such as the film type or digital camera.
When the shutter is open, detail in the scene begins to emerge on the
film's chemical emulsion or the digital sensor. The brightest light
responds faster, causing the detail in brighter areas to be captured
first. If the range of light between the brightest and darkest areas
in a scene is limited, then chances are that you will capture detail in
both the highlights and the shadows, reflecting a technically accurate
image, which is probably what you were looking for. On the other hand,
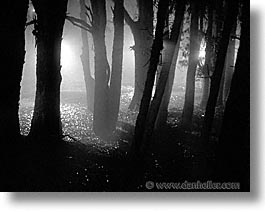
if you point the camera at a forest of trees with bright light behind it,
there can be a mix of light and dark areas. The longer you expose,
the more detail you'll get in the lower-lit shadowy areas. However,
you'll begin lose detail in the bright areas because the camera is
still capturing light. What's the correct exposure? It may not
necessarily be an average of all those areas at the same time, especially
since you cannot get everything. You must choose: highlights or
shadows? We'll get into a discussion on choice soon, but first, let's
have a better understanding of how meters work.
 Measuring Light
If light has a strong intensity, it will imprint an image more quickly
than if it has a weak intensity. Light meters measure that intensity
so you can tell your camera how long to expose to that light so as to
capture a photograph. There are typically two kinds of light meters:
incident, which detects the amount of light projected onto it,
and reflective, which detects the amount of light reflecting off of
a subject. Use of these two meters is very different, but since most
people use their cameras to both meter the light and take the picture,
I will address only those used in cameras: reflective meters.
Let's say you were looking through a tube and moving it around as though
you were looking through a telescope. If you look at someone's face,
you may just see their nose or their eye; if you look at the sky,
you might just see a round patch of blue; and finally, if you pointed
it at the shadows in the ground, you may just see plain black or very
dark brown. As you can guess, if you were to measure the light in each
of these cases, you would probably get a different value. Yet, if you
were to look at the world through your camera and move it around, you'd
see a complex set of color and light combinations. Measuring reflected
light can be tricky because you need to determine how much of a subject
represents the light that you want to capture.
Since there is rarely a single method to determining how much of a scene's
light you should measure, most of today's SLR cameras are built with
three metering methods: center-weighted, evaluative, and spot metering.
Most point-n-shoot or manual cameras (or anything older than 10-15
years) use center-weighted metering. In the simplest terms,
when you use your camera in automatic mode, your camera finds the
lightest and darkest areas of the scene (as you point it in any given
direction), and figures out the average light.
Most consumers and amateur photographers put their subjects in the
center of the frame, so this covers most amateur picture-takers.
This technique works best when the light doesn't vary much in the scene,
such as at the beach, or general wide-angle scenics. However, this method
fails when scenes are complicated with dark and bright areas scattered
disproportionately in the composition. This likely results in poorly
exposed pictures.
Evaluative metering is a system that has several "zones" in the viewfinder
(not to be confused with Ansel Adams' "zone system"). In this
case, each of the zones does the same thing, and the camera's computer
(thus, only newer cameras tend to have this) figures out an average
light reading and sets exposure appropriately. This is where most of the
new technology is being developed in cameras today. Also called
matrix metering by some camera manufacturers, one can apply this method
similarly to the center-weighted technique discussed above to a broader
range of scenes simply because the technology can figure it out.
Finally, there is spot metering, referring to a very small portion of the
scene, usually 3-5%.
Newer or more expensive cameras get really small, sometimes down to 2%.
You can also purchase expensive, hand-held meters that can pinpoint down
to 1% of the view. What is the point of reading such a small percentage of
the scene? Usually, photographers are looking for a specific color so
they can set their meter according to that value as a reference point.
The image shown here illustrates this technique: using a spot meter
to find the value of the light from the green grass yields a good middle
value. Setting the camera to the readings associated with that light value
will make the entire scene exposure correctly, even if that means losing
some detail in the highlights and the shadows. Will the green grass always
yeidl the same result? of course not—the sun in this scene is much lower,
giving less light, than it would be if it were midday. The same color
does not necessarily yield the same light value from picture to picture; the
value depends solely on the amount of light reflecting off of it.
Serious photographers vary in their preferred technique, although most
will use spot or evaluative metering under different conditions.
Spot metering obviously involves the most work, and is therefore rather
time-consuming, which may not always be possible. It's a great way to
figure things out when you're getting familiar with how to read a scene,
but you will eventually find you don't need to use it that much as you
get better. (Purists have a serious problem with this. You should try
to avoid purists whenever dealing with photography... or anything for
that matter.)
 Flat Light
Scenes that have flat light are those where the range of light
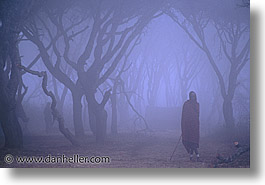
between the brightest and darkest areas is relatively limited. Foggy
pictures tend to be this way, and, as such, are generally the easiest
to meter correctly.
In this case, your camera doesn't have to do much work, and you don't
have to worry about technical controls. You just compose the picture and
shoot. That's not to suggest that such pictures will always come out well.
For one thing, it requires a more sophisticated eye to see the quality
of the scene in the first place, and it also may require some added
processing after the fact to bring out detail that would otherwise be
minimized by the lack of contrast. Images that are "too flat"
are often boring and lack dynamics. In such cases, adding contrast usually
solves this problem—this can be done using a higher-contrast film,
which is also a lower speed film (such as ASA 50 or slower), or by
adding contrast filters, or in the printing process (or digital enhancement),
or by digitally editing photo to increase contrast. (Some digital cameras
can do this in-camera as well.)
Shooting in flat light is a great way to create mood, and I highly
recommend working on it to develop your creative eye. It's not always easy.
However, this section isn't about that. Most scenes have a wide variation
of light values, so it's important to figure out what light there is,
and then deciding on what light you want.
 An Experiment
To get a good understanding of how light varies within a scene and to put
some of these techniques to use, try the following exercise. Set your camera
to spot-metering (if you have it; otherwise, use whatever you've got),
and set your camera's shooting mode to aperture-priority.
This is so that only the exposure values change depending on the lighting,
while the aperture value remains fixed. Let's say you chose f8 as the
fixed aperture for this experiment. Now, press the shutter button
halfway down to activate the meter, but not all the way so that a picture
is taken. Release the button. With some cameras, the meter reading
will remain active for a period of time (often, for 6 seconds; when the
time expires, touch the release button again to reactivate the meter).
While the camera is in metering operation, move the camera around the
scene and see how the exposure values change. You might see the speed
go from 1/60 to 1/350, for example. If you are outside, you can point
it towards the sun and see it go up to 1/2000 second, or faster if your
camera can go that fast.
Once you find the darkest and brightest areas of the important
part of the picture (not the whole picture), then you have the range
of values for the aperture you've chosen. So, if you chose an aperture
of f8 and your time exposures ranged from f/30 to f/500, then you can
pick the middle of those 5 values: 30, 90, 180, 350 and 500. So, 125
or 180 look like good choices. You could shoot a picture at both settings
and see the difference in how they came out.
In the end, the meter is only as good as the choice of object you're
metering on. That's a technique/skill that takes some getting used to
and is the very essence of creative photography. So, let's talk about
how to put that technique to use.
 Finding What's Important
The first task in getting the best light reading for your picture is
to find the most "important" areas of the scene and determining the
lightest and darkest parts of it. You may also want to emphasize more
of one part of the picture than another, such as the sun in a sunset
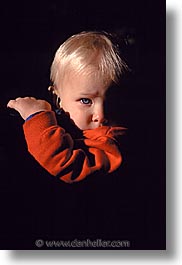
picture, the color of a plant in a shady spot, or the eye of a child,
like in the photo shown here. Not everything in the view is important;
the creative process is all about your decision on what you think
is important. More often than not, the important part of your picture is
the subject, which may seem obvious, but how that subject will
be rendered in the final picture may vary dramatically with different
metering techniques. For the photo of the child, I chose
to meter directly on his face, which was the brightest part of the picture.
My camera reported that the picture would underexpose because it was taking
into account the entire scene, most of which was very very dark.
In fact, the picture was in a forest, and a streak of light happened to
hit the boy's face, causing everything behind him to be comparatively dark.
Had I exposed this picture according to the camera's recommendation, his
face would have been over-exposed, and the forest areas around him would
have come out with some detail, but too muddy to really make out. In
this case, I knew what I was doing, and is part of how experience helps
you decide how you want to meter a picture.
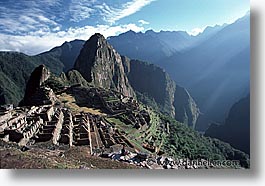
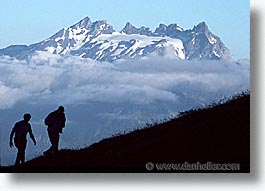
If you're looking for a lighting effect, such as the silhouettes
of the hikers, you may choose to emphasize different parts of the scene
to get different light values. In this case, I metered on the mountain
itself so it would expose properly, letting the other subjects fall
to black. Since they were in the shadows, I couldn't possibly get the
people to expose properly along with the mountain at the same time,
even though that's what my eye saw.
The two examples above generally involve more sophisticated
methods that is often counter-intuitive to most beginners.
That said, people often do these things by accident, which is a good
thing. Experimentation is often the best teacher, so long as you figure
out what you did in retrospect.
 Everyday Shooting
People ask me what mode I shoot in. Again, it varies, depending on
the conditions and the effect I want to achieve, but for day-to-day
grab shooting in the streets, and in general where I'm not doing anything
out of the ordinary, I am most often in aperture-priority mode, using
evaluative metering. I don't use automatic mode, also called
program mode, which allows the camera to choose both the aperture
value and the shutter speed value. While the picture may be exposed
properly, it may not have the depth of field I want... or, in a few
cases, it may choose a longer or shorter shutter speed than I may need.
In general grab-shooting situations where people are 10+ feet away from
me, I'll set the aperture between f3.5 and f5.6, and let the shutter
speed do whatever. In low-light situations, I can usually get by, and
in well-lit scenes, I'll just get a lot of speed out of the shutter. I'm
not concerned with getting a deep DOF at that distance.
There are some situations where I want a longer exposure that would otherwise
be unnecessary for a normal picture. Motion blur is one example of this.
Here, I set the camera in "shutter priority" mode ("TV" on Canon Cameras),
set the exposure to 1/8 or 1/6 of a second, and let the aperture fall
to whatever value it ends up being, usually, around f22 or some other high
value (because that's a long time for the shutter to be open, so to expose
the photo well, the camera is going to have to have the smallest aperture
possible to let the least amount of light in for that duration of time).
When in a moving object, the faster things move, the more they'll blur.
The less they move, less blur. Accordingly, things that are far away will
appear to move less (less blur) and closer things will appear to move
more quickly relative to us (more blur). Things move at different speeds
relative to their positions to the camera. Sound familar? (Perhaps,
Einstein's "Theory of Relativity"?) Slower shutter speeds illustrate
this effect well.
 Using Reflectors
There are other techniques for balancing light. Just as a flash
can introduce more light to a dark area, you can also reflect light
into dark areas to balance out the light. This is also called bouncing
light. Many are made specifically for photographers, costing upwards $50.
I use the $10 car windshield panels you can buy in auto parts stores.
They come conveniently in two colors: shiny silver and shiny gold.
They make them shiny because light reflecting out of the car keeps it
cooler. For photography, these reflective materials are great for adding
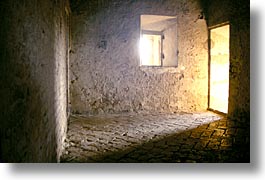
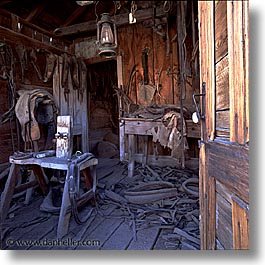
a cooler (silver) or warmer (gold) tone to your images. The "tack room"
photo is lit entirely by bouncing afternoon light using a gold panel.
The bluer areas at the bottom of the room is not getting the benefit of
the gold tone, which adds to the drama of the scene.
Or, you can choose to
reduce the amount of light in bright areas using filters or diffusers.
Imagine looking at the sun, and then imagine what the light does if you
were to hold up a white sheet. The amount of light isn't eliminated, but
it is reduced, and it's also diffused, which means that it spreads out
more evenly on the subject.
Finally, one can process images in the darkroom, or digitally, or during
the printing process to help bring out detail, but not at the same
level as the rest of the scene. Just as different light is exposed
onto the film or digital sensor when you took the picture, you can
alter the amount of light projected through the film onto the photo
paper to bring out more detail, or onto the screen for digital editing.
(This is commonly called dodging and burning in both the darkroom and
digital editing tools, such as Photoshop.)
The techniques described above are more advanced, and yes, it's time-consuming
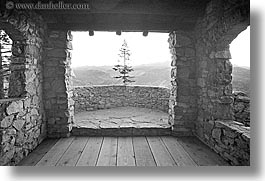
and often difficult, if not tedious. The Black and White image of Glacier Hut
in Yosemite National Park took several hours to complete. This is why a
really good photograph is often much harder to get than the simple scene
it may appear to be. However, there are really easy, simple and effective
techniques you can use to balance out the light in a scene when taking
a picture in the first place that you can use right away. We'll address
all that later.
 Tips and Tricks
Different media types require different techniques. If you're shooting with
a digital camera, it's generally the case that sensors pick up more "detail"
in darker areas than brighter ones, which means that even a properly exposed
picture will have better details in the shadows than the highlights. (This
also happens to be the case for most film types.) For this reason, it's
slightly better to under-expose pictures when you shoot them, because this
will have the side-effect of under-exposing the highlights. This will help
you preserve details in the clouds and other bright objects. The darker
areas will be "darker" indeed, but you can bring back that detail in the
"processing" phase. That is, if you're using film, you can over-expose
the printing process to even out the brightness, and thus preserving more
detail in the final print. When using digital cameras, you can also bring
back the darker shadow detail in the digital editing program.
("Shooting for the shadows" is the basic premise of the Zone System.)
Too much contrast (distance between the lightest and darkest areas of the
scene) will cause either the lights or the darks to "blow out" (lose
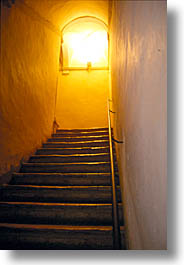
detail). This may be what you want; the photo shown here, for example,
is precisely what I wanted because, even though I could see the scene outside,
I knew that the orange paint on the walls would give a nice glow if I
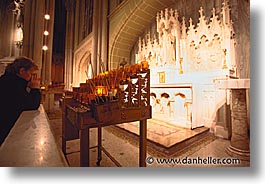
overexposed the shot. It also helped bring out the details in the stairs,
which was the darker part of the scene. In this case, this photo was
taken by design, so, it isn't necessarily "bad" if part of the image is
blown out.
However, this may not always be the case, and here is where you will be
challenged. The rule of thumb is that you cannot capture more than six
"stops" of light between the brightest and darkest part of the picture
in which you want to capture image detail. If you try to get more
than that, you're going to lose one or the other (or both), depending
on which end of the scale you choose to set your exposure.
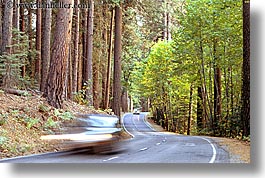
Forests are notoriously difficult scenes since trees cause very dark
shadows, and with the bright sunlight, it's a recipe for extreme contrast.
If you're thinking about those great posters or postcards of wonderful
forest scenes, those are done using one or more of a combination of
techniques: perhaps the use of studio flashes to bring up details,
and/or the use of dodging and burning, the same as used in printing
or digital image editing.
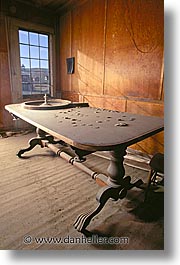
The photo of the roulette table under the window is a double exposure,
and therefore can only be done with film. That is, two pictures
were taken of the exact same subject on the same frame of film.
(The digital method is similar, but different enough that it doesn't
apply here.) The reason for doing it this way is because the difference
between the interior and the exterior light is too broad to get an
accurate exposure in one shot. So, I took two exposures on the same
frame of film: one for the interior, and the other for the exterior.
In the first picture, I put a black panel over the Window to block the
"bright" light, leaving the roulette wheel and the rest of the interior
moderately (but adequately lit). No harsh shadows. The black panel also
left a similarly black rectangle
on the film where the window was. So, after removing the panel and
shooting the second exposure, I metered entirely on the outside light.
This had the effect of filling in the black square on the film where
the panel was with the light projected from the outside. Because it's
so bright, the fast shutter speed properly exposed it, yet didn't leave
enough time for that light to ruin the previously exposed interior
part of the image, except for a few accent highlights and reflections
should only contributed more to the natural look of the scene.
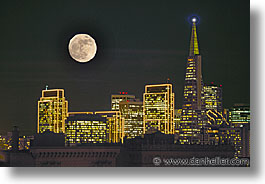
For another example of using the double-exposure technique, see How to Take Pictures of the Moon.
If you want the white backdrop to look "pure white", the rule of thumb
is to have its luminescence be 2 stops over the subject. To figure this
out, take a picture of nothing but the white backdrop by setting the flash
at any given value (but make it high enough that you can stop down to a
desireable setting and still have a fast enough shutter speed to handhold),
and take a picture in aperture priority mode. Say, f11. The light bursting
on the backdrop will be white to you and me, but the camera will interpret
it as middle grey. Whatever speed your camera yielded for that photo is
probably going to be 2 stops under the desired setting for "white". For
example, if you shot it at 1/250 with your f11 aperture, and that's two
stops under, you need to lengthen the shutter speed by two stops to get
your desired "white" background. The subject will appear appropriately
lit...
Click to recommend this page:
|
|
